Facebook live videos are becoming increasingly popular - I see quite a few businesses using them as a daily marketing tool on Facebook. They can be incredibly effective at engaging with your audience - and it's really easy to make them better!
These are just the tip of the iceberg - over the next few weeks I'll talk about more tips and tricks, and provide more in-depth details on how to make your videos stand out.
Here are 5 tips and tricks on how to improve your live videos:
1) Better audio
There is one simple truth about videos: if you don't have good audio, people won't stick around to watch.
Most people who shoot live videos are doing so with a smartphone or a webcam - both of which generally have poor quality built-in microphones. There are two things you can do to drastically improve your audio quality:
1. If you are using a smartphone to shoot your videos, buy yourself lavalier microphone (example here: https://tinyurl.com/rodelav5). Simply attach the microphone to your shirt, plug it into your phone's headphone jack, open up your preferred recording app, and shoot away.
2. If you are shooting using a webcam, get yourself a USB desktop microphone, or a USB headset with attached microphone. There are numerous options online (brands to check out include Rode, Logitech and Microsoft).
When the headset/microphone is attached, your recording software should automatically pick it up and use it.
No more bad audio! Easy.


2) Headroom
This one may seem simple - but it makes a big difference. When you frame yourself up with your camera of choice, make sure you are the focus of the shot! I see too many videos online where the ceiling or the wall are the primary focus in the shot.
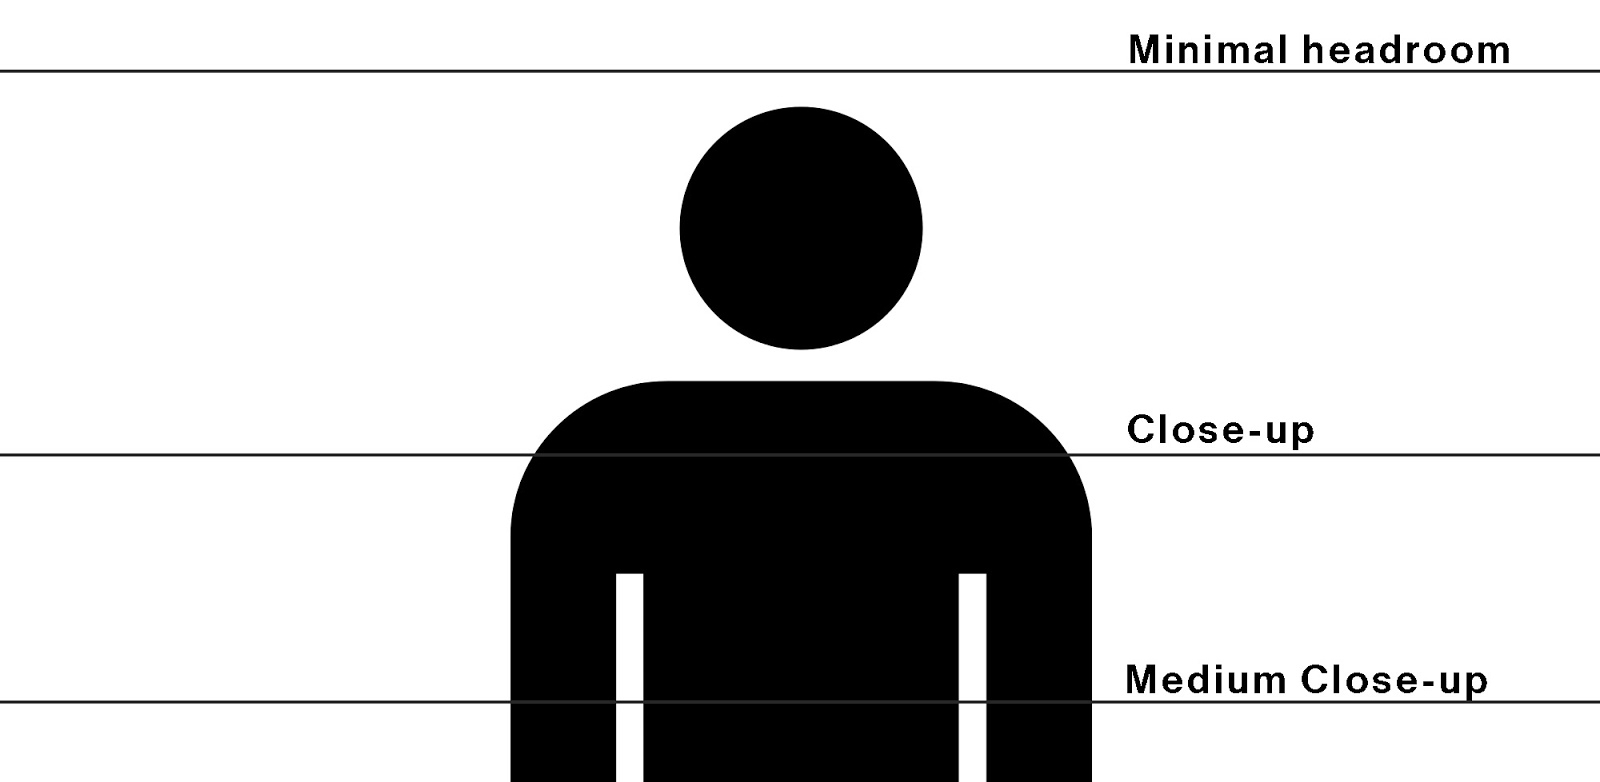
For most live videos involving one subject (you) talking to the camera, these are the two best standard shot sizes:
1. Medium close-up: a tight shot, but not uncomfortably close. The bottom of the shot usually sits at the subjects elbows.
2. Close-up: a tighter shot, showing mainly the head. Can be used for more intimate/personal content. The bottom of the shot usually sits mid-neck, or near the top of the shirt.
I hear you asking why this matters. Well, these are two standard shot sizes used regularly in news, documentaries, movies, etc. People are used to how they look - and it will make your video look more professional.
3) Lighting
A dark shot screams "amateur". I'm not saying go out and buy a professional lighting kit - it can be as simple as sitting facing a window to take advantage of the natural light.
If that doesn't work, try a lamp or any other light source. Simple!
4) Exposure
Does your camera allow you to set manual exposure? If so, I recommend using it! There's nothing more distracting than the camera automatically adjusting the exposure (brightness of the image) constantly while you're talking.
If your camera allows manual exposure, you can set it and forget it!
One exception: If you're walking around or outside where the light is changing, then automatic exposure can sometimes be easier.
5) Length
This one is simple. Say what you need to say in the shortest amount of time possible! You've only got about 10 seconds before most people will get bored and click off your video - so grab their attention straight away!
And that's it for this round... go and make awesome videos!!
No comments:
Post a Comment
Note: only a member of this blog may post a comment.